HomeBlogDIY Home ProjectsThe Ultimate Guide to Desk Organization for a Productive Workspace You’ll Actually Love
The Ultimate Guide to Desk Organization for a Productive Workspace You’ll Actually Love
Let’s be honest: a messy desk is basically a stress magnet. But a well desk organization one? That’s your productivity power-up. We’re talking fewer distractions, faster focus, and a workspace that looks so good you’ll actually want to sit down and work. Cozy vibes, smart systems—let’s build both.
1. Declutter Like You Mean It (Then Set Sneaky Boundaries)
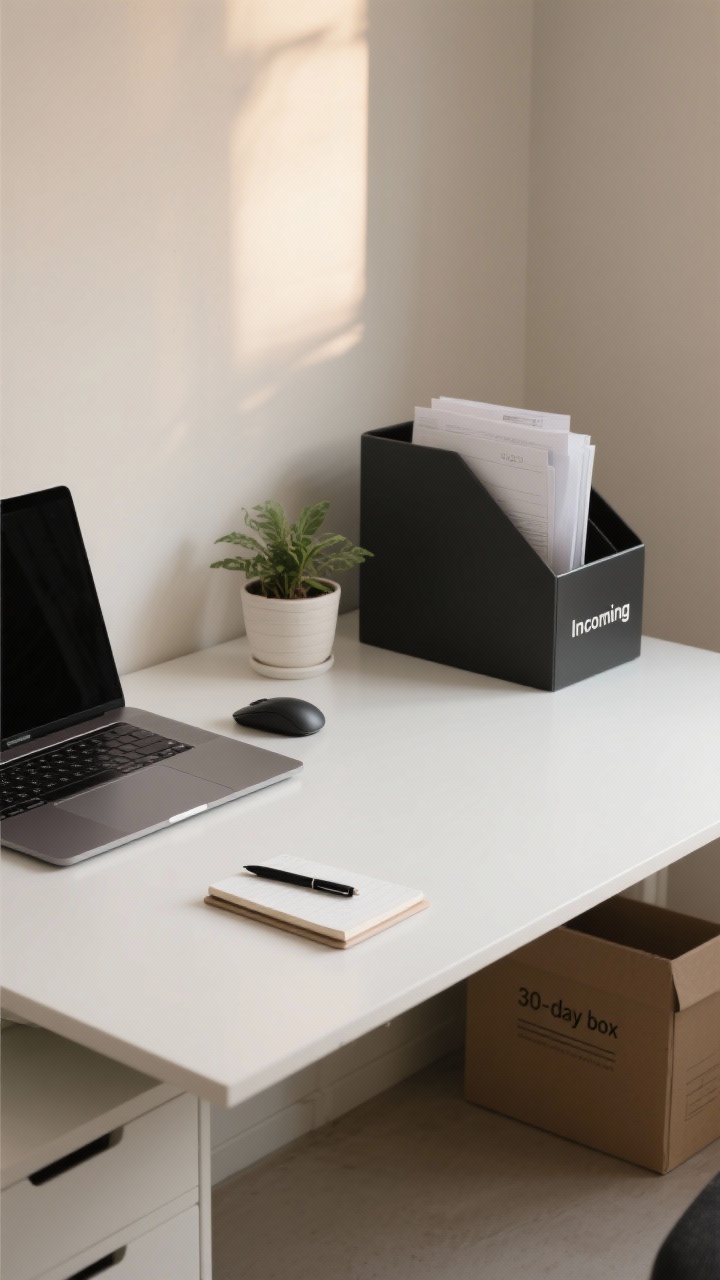
Before you buy a single organizer, clear the chaos. If it doesn’t help you work, it doesn’t belong on your desk. Keep the daily essentials within arm’s reach, and everything else goes in a drawer, a bin, or out of your life. Yes, that pile of “important” papers from last quarter can go.
What Stays On The Desk?
Tools you use daily: laptop, keyboard, mouse, notepad, pen.
One personal touch: a plant or photo. Not five. One.
Current project: a single folder or tray—limit it to what you’re actually working on this week.
Set No-Go Zones
Paper quarantine: One vertical file or tray for incoming paper. If it overflows, you process it—no excuses.
Surface rules: Leave a clear writing zone and a device zone. Nothing else camps there.
End-of-day reset: Two-minute cleanup before you log off. Future-you will send thank-you cookies.
FYI: If you’re struggling to let go, create a 30-day box. Toss questionable items in. If you don’t touch them in a month, they’re gone. Brutal? Maybe. Effective? Absolutely.
2. Build Zones That Work (So Your Brain Doesn’t Have To)
Your desk should run like a tiny, chic command center. Create clear zones so every task has a home—and you stop losing things under your laptop. This isn’t just neat-freak stuff; it saves decision energy and time.
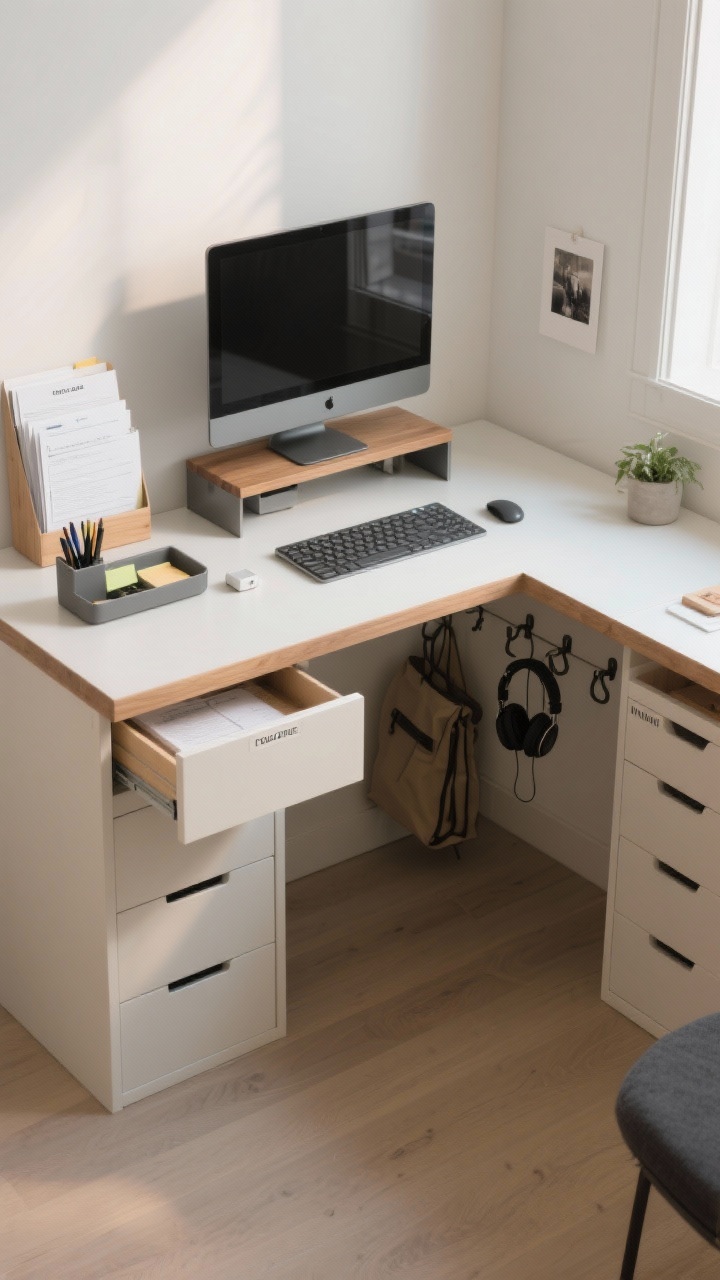
The Four-Zone Setup
Focus Zone: Center stage for your laptop/monitor and keyboard. Keep it clean—no piles allowed.
Paper Zone: A slim tray or vertical file to the side for current docs only.
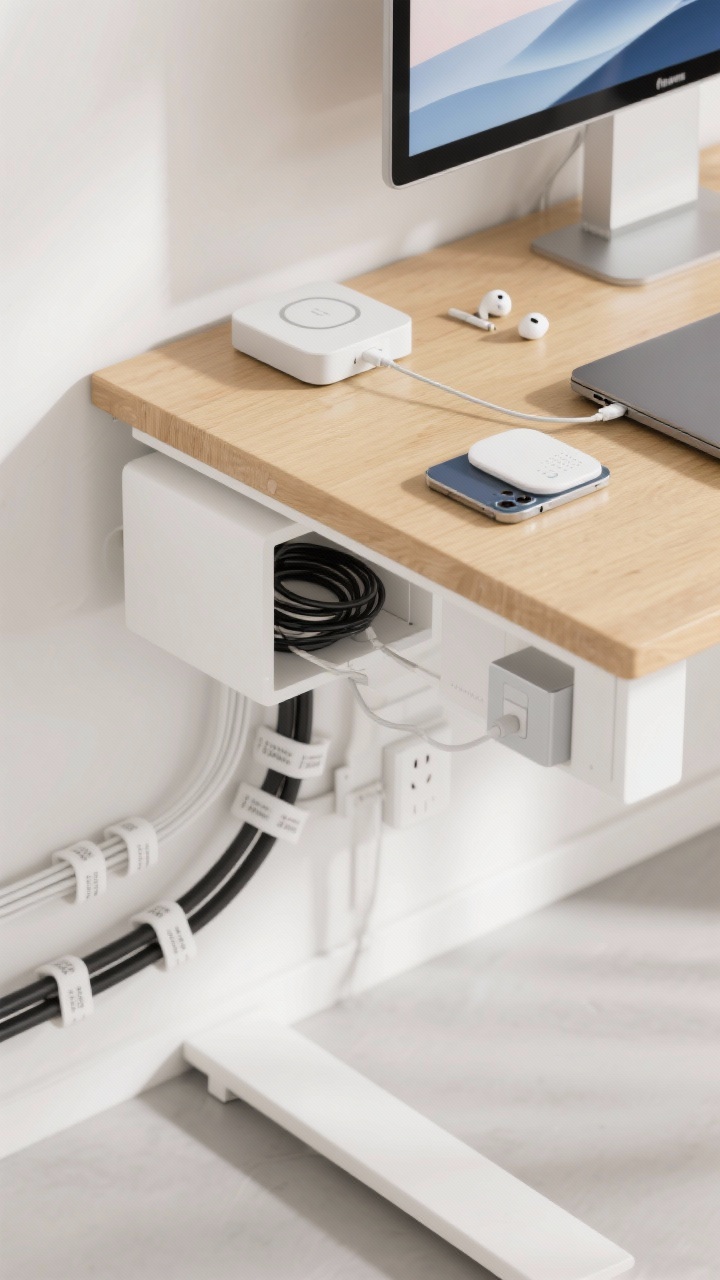
Tool Zone: Pens, sticky notes, chargers in a drawer or caddy. Keep it minimal (you don’t need seven highlighters).
Inspiration Zone:One plant, a candle, or a small photo. It should spark joy, not clutter.
Smart Extras
Monitor riser: Creates a shelf for notebooks and frees up space.
Auto-backup: Cloud sync + weekly external backup. Disaster-proofing is chic.
Notification audit: Kill the non-essentials. Your brain doesn’t need 47 pings an hour, IMO.
Bonus: Add a simple screensaver or clean wallpaper. It’s tiny, but it instantly makes your space feel calmer and more curated.
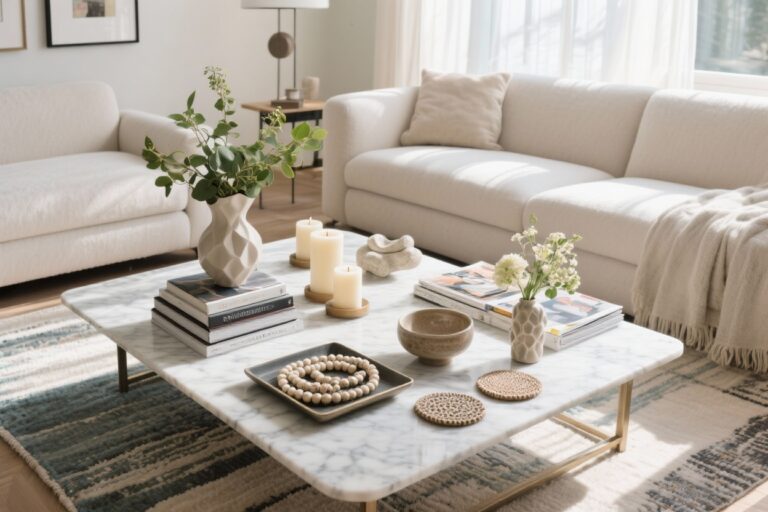
4. Style Meets Function: Curate, Don’t Clutter
You can have a space that’s pretty and productive. The trick is picking functional decor that earns its spot. Think warm textures, simple shapes, and materials that play nicely together.
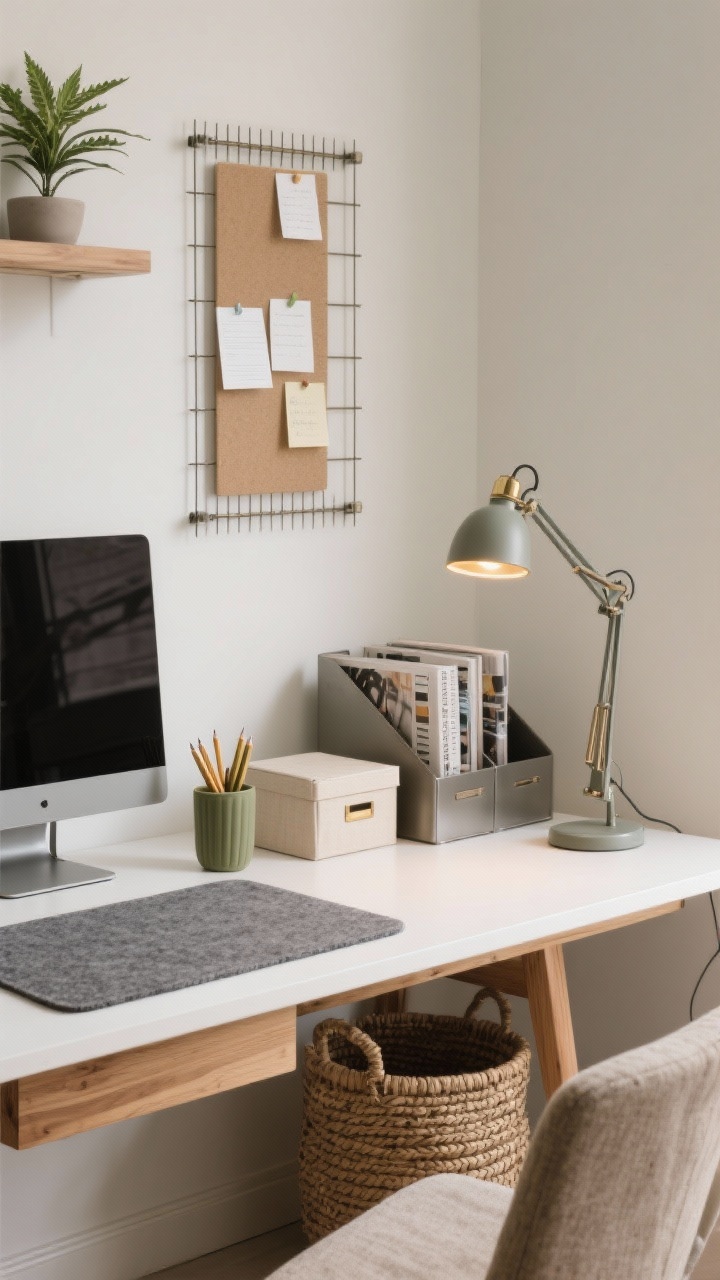
Textile touches: A felt desk pad or linen pencil cup. Adds texture, quiets noise.
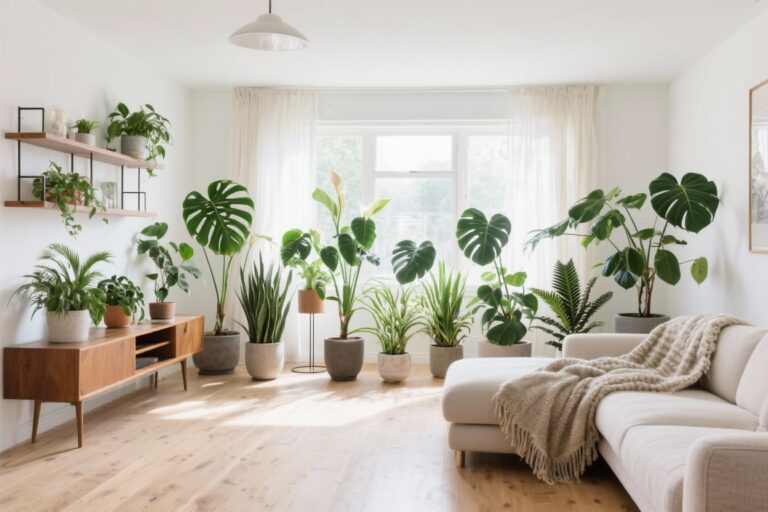
Greenery: Low-maintenance plants like pothos, snake plant, or a tiny ZZ. They lift the mood (and hide dust—kidding, sort of).
Choose Decor That Works Hard
Beautiful storage:Woven baskets, lidded boxes, and magazine files in a cohesive palette.
Vertical mood board: Cork, grid, or rail system for notes and inspo—off the desk, on the wall.
Task lighting: An adjustable lamp with warm LEDs. Your eyeballs will thank you.
Color Palette That Calms
Base: Neutrals (white, sand, charcoal) for large surfaces.
Accent: Two colors max—sage and brass, navy and walnut, black and wheat.
Edit ruthlessly: If it fights the palette, it leaves. Visual clutter = mental clutter.
Keep one statement piece—like a sculptural lamp or framed art—and let it shine. Everything else stays quiet and purposeful.
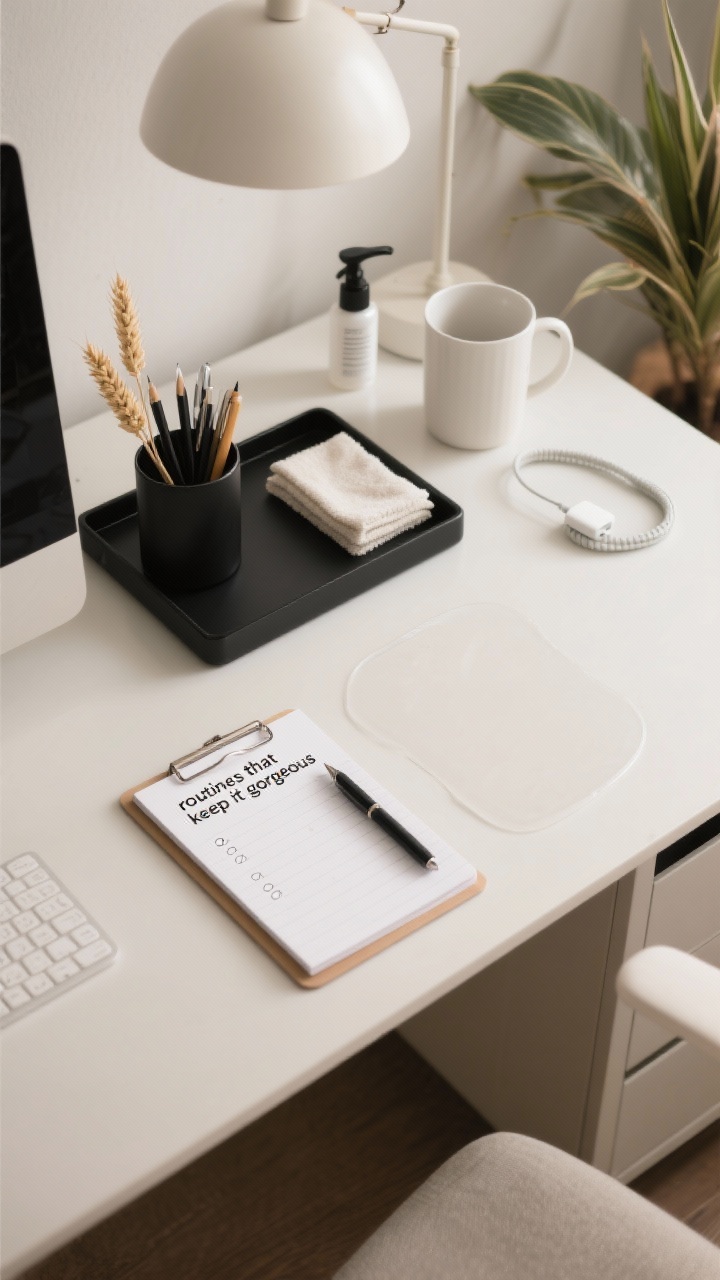
5. Create Routines That Keep It Gorgeous (And Productive)
Organization doesn’t last without systems. Make it easy to stay tidy with tiny, repeatable habits that take minutes, not hours. Think less “spring cleaning,” more “two-minute tune-up.”
Daily Mini-Reset
Start clean: Clear cup, fresh notepad, one task list. No random piles.
End with order: Pens away, paper filed, wipe the surface. Two minutes, tops.
File and purge: Sort the paper tray, recycle aggressively, scan what matters.
Wipe and refresh: Dust the monitor, wash the mug, water the plant.
Restock: Sticky notes, ink, chargers in working order. Nothing derails a flow like a dead pen.
Quarterly Refresh
Upgrade one thing: Better lamp, comfier chair pad, quieter keyboard. Small changes, big payoff.
Revisit zones: Did your work shift? Update storage to match reality.
Style swap: Rotate art or desk pads for a micro glow-up. Keeps it fun, not fussy.
Also: calendar a “desk date.” Same time each week, ten minutes, no rescheduling. Systems stick when they’re scheduled—annoying but true, FYI.
Final Takeaway: A productive desk isn’t about having the most organizers—it’s about having the right few and using them consistently. Declutter, create zones, tame the tech, style with intention, and keep it all humming with simple routines. Do that, and your workspace will stop draining you and start driving your best work.
You’ve got this. Now go give your desk the makeover it deserves—and then show it off. We won’t judge.


Leave a comment